Home » Posts tagged 'rack ends'
Tag Archives: rack ends
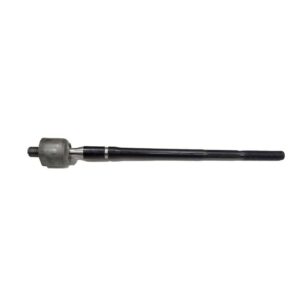
How to Install a rack ends?
Installing rack ends can be a relatively simple process, but it does require some basic knowledge of vehicle mechanics and the use of appropriate tools.
Here are the general steps you can follow:
- Raise the vehicle with a jack and support it with jack stands. Make sure the vehicle is secure and stable.
- Locate the rack end on the steering rack. You should be able to see it where the tie rod connects to the steering rack.
- Loosen and remove the nut that secures the tie rod to the rack end. Use a wrench or socket set to do this.
- Use a tie rod end puller tool to separate the tie rod from the old rack end. This tool can be rented or purchased from an auto parts store.
- Remove the old rack end from the steering rack. It may be necessary to use a pry bar to gently separate it from the steering rack.
- Install the new rack end onto the steering rack. Make sure it is properly aligned and fully seated onto the rack.
- Thread the tie rod onto the new rack end and tighten the nut. Use a torque wrench to tighten the nut to the manufacturer’s specifications.
- Check the alignment of the steering system and make any necessary adjustments.
- Lower the vehicle to the ground.
- Take the vehicle for a test drive and ensure that the steering is functioning properly and there are no unusual noises or vibrations.
It’s important to note that the exact process for installing rack ends may vary depending on the make and model of your vehicle, so it’s always a good idea to consult your vehicle’s owner manual or a trusted mechanic for guidance.
How To Customize rack ends?
Customizing rack ends is not a common practice, as they are typically replaced with new ones when they are worn or damaged. However, in some cases, it may be necessary to modify or customize a rack end to fit a particular application.
Here are the general steps you can follow to customize rack ends:
- Determine the specifications of the rack end that you need. This may include the length, thread size, and other dimensions.
- Identify the type of material that you want to use for your customized rack end. Common materials include steel, aluminum, and titanium.
- Use a lathe or milling machine to shape the material into the desired shape and size for the rack end. This will require knowledge of machining techniques and the use of appropriate tools.
- Drill and tap the necessary threads into the rack end. Use a tap and die set to ensure that the threads are the correct size and pitch.
- Install any necessary hardware, such as locking nuts or washers.
- Test the customized rack end to ensure that it fits and functions correctly.
It’s important to note that customizing rack ends requires advanced mechanical skills and specialized equipment. It’s also important to ensure that the customized rack end is safe and meets the necessary specifications for your particular application. If you’re unsure about how to customize rack ends, it’s always a good idea to consult with a trusted mechanic or machine shop for guidance.